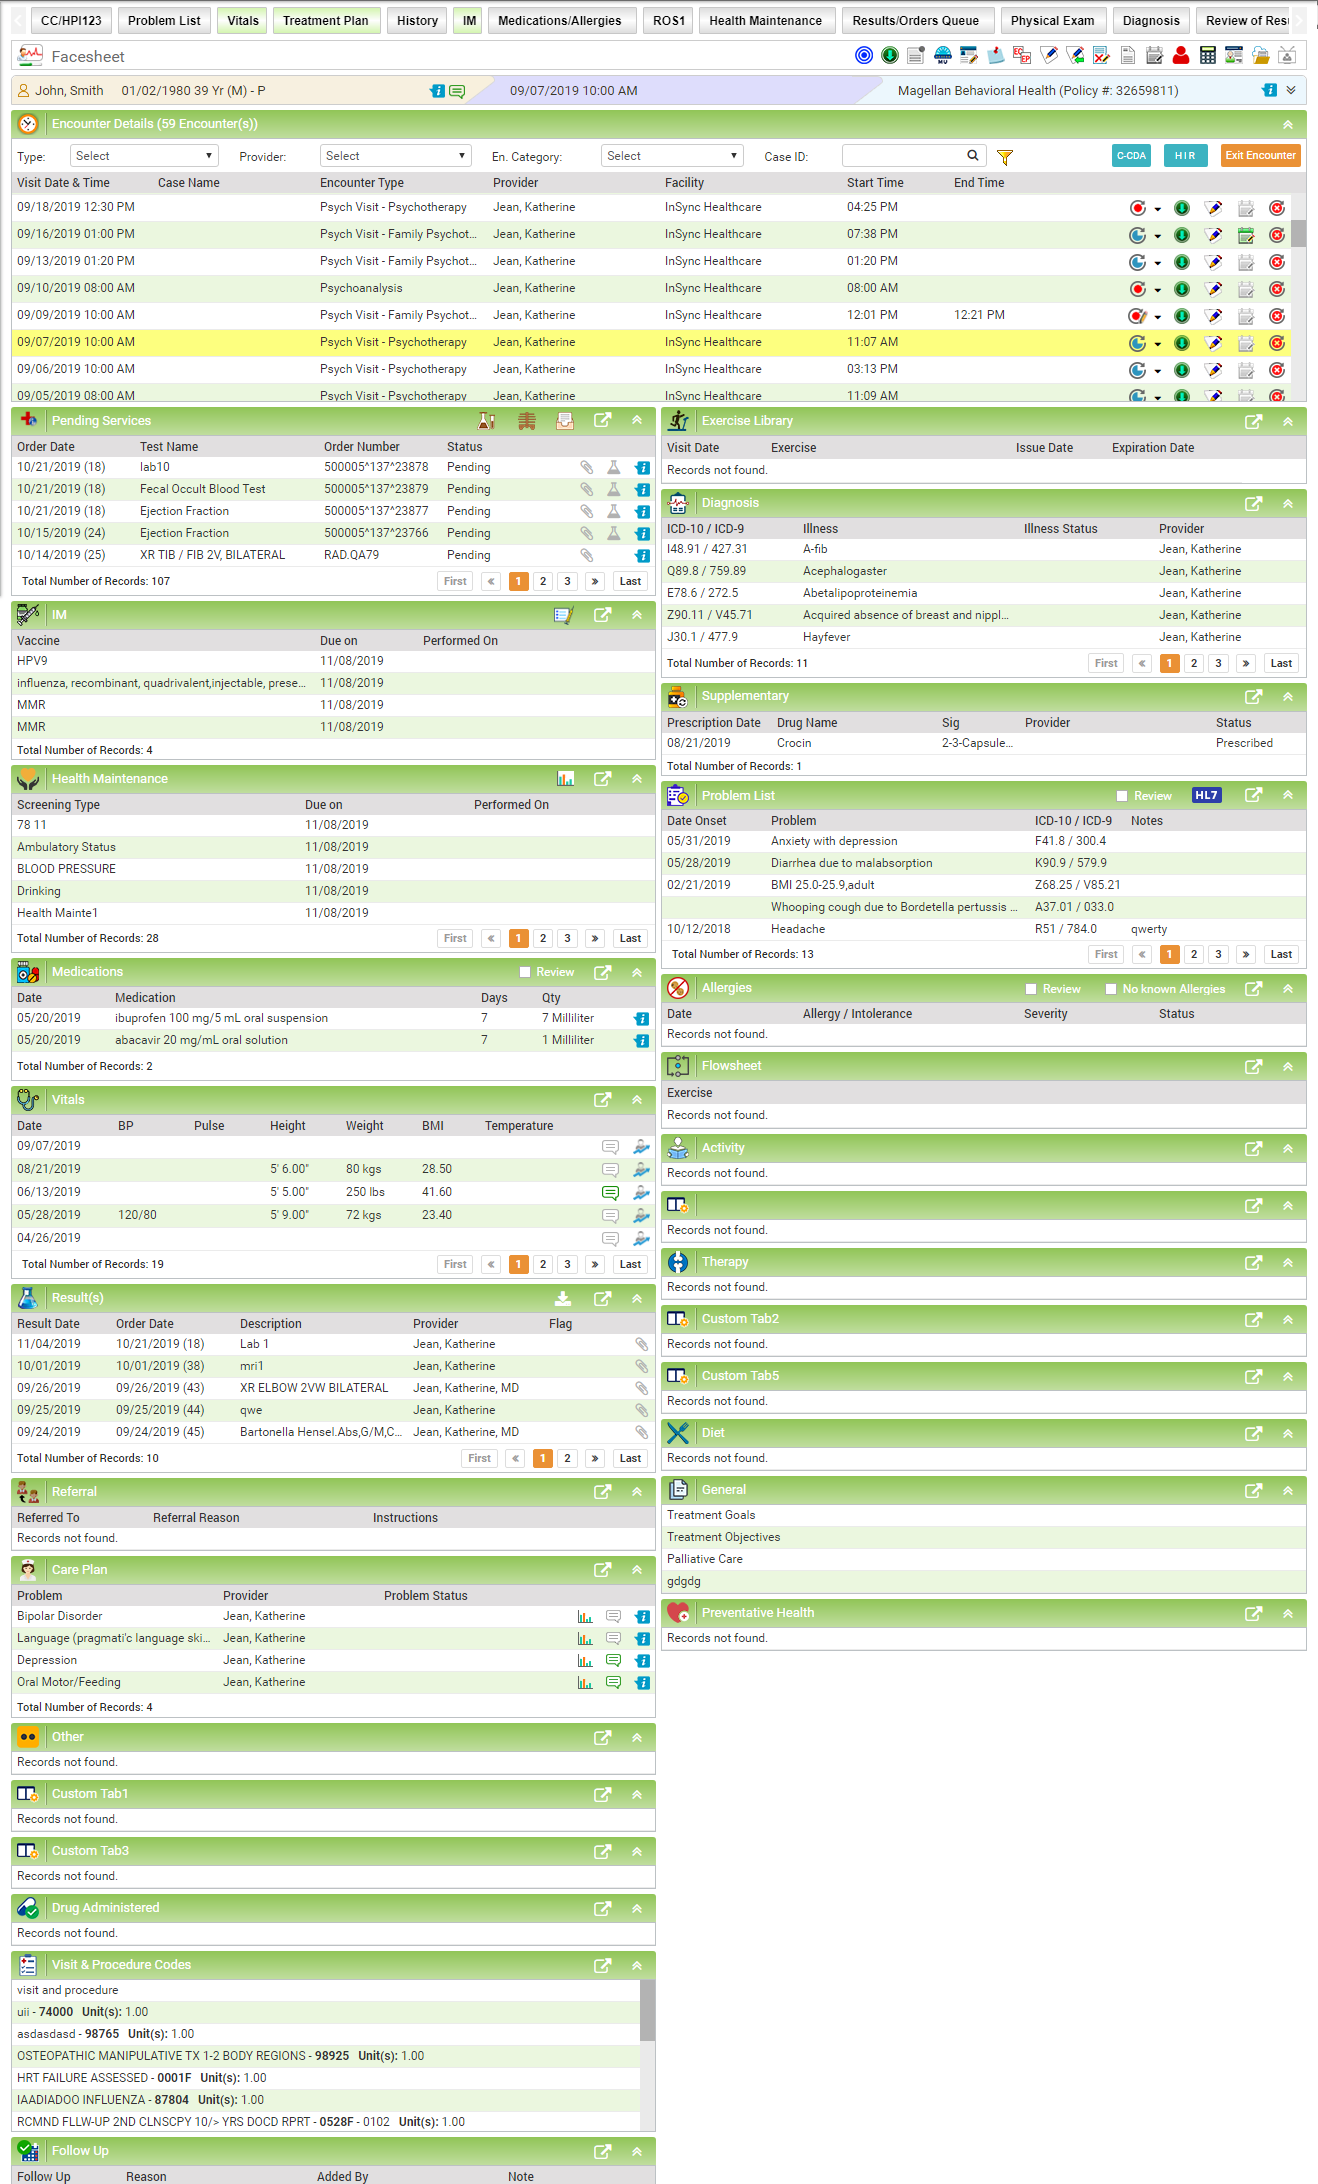
The Facesheet section consists of the patient's clinical information and medical records. You can record patient's visit details in corresponding charting elements. The details recorded in Facesheet are maintained for future reference.
The Facesheet can be accessed by one of the following ways:
| • | From the left pane, click the Patient Search icon  . On the Patient Search screen, click the Facesheet icon . On the Patient Search screen, click the Facesheet icon  next to the patient name from right side. next to the patient name from right side. |
| • | From the left pane, click the Facesheet icon  . On the Patient Search screen, click any patient name link. . On the Patient Search screen, click any patient name link. |
| • | Expand left pane, select Charting > Facesheet. On the Patient Search screen, click any patient name link. |
The Facesheet screen shows the list of encounters and summarized view of charting elements. On the Facesheet screen, you can:
| • | View all encounters of patient in the Show Encounter Detail section. |
| • | Start new encounter by clicking the Start Encounter button. |
| • | Generate the C-CDA and the Health Maintenance Reports. |
| • | View audit related information by clicking the the Audit Tool icon  from the floating bar. from the floating bar. |
| • | Update encounter details by clicking the Update Encounter Details  icon from the floating bar. icon from the floating bar. |
| • | Add or update sticky notes for patient by clicking the Sticky Note icon  from the floating bar. from the floating bar. |
| • | Set meaningful use stage reminder by clicking the Meaningful Use Reminder icon  from the floating bar. from the floating bar. |
| • | Create the custom clinical forms for Facesheet by clicking the Custom Clinical Form icon  from the floating bar. from the floating bar. |
| • | Work on the To Dos assigned to patient by clicking the icon  from the floating bar. from the floating bar. |
| • | Copy encounter details recorded in previous encounter by clicking the Copy Previous icon  from the floating bar. from the floating bar. |
| • | View encounter note (SOAP) by clicking the Encounter Note icon  from the floating bar. from the floating bar. |
| • | View previous encounter's note by clicking the icon  from the floating bar. from the floating bar. |
| • | End encounter by clicking the icon  from the floating bar. from the floating bar. |
| • | Print consultation letter by clicking the icon  from the floating bar. from the floating bar. |
| • | Add notes by clicking the icon  from the floating bar. from the floating bar. |
| • | Navigate to Patient Demographics screen by clicking the icon  from the floating bar. from the floating bar. |
| • | View E&M calendar by clicking the icon  from the floating bar. from the floating bar. |
| • | View important documents of patient by clicking the icon  from the floating bar. from the floating bar. |
| • | Start the telemedicine visit on the fly by clicking the icon  from the floating bar. from the floating bar. |
| • | In the Encounters grid, click the drop-down arrow next to encounter icon  . This will open a list of all charting elements of that encounter. You can then quickly access the charting element you want. . This will open a list of all charting elements of that encounter. You can then quickly access the charting element you want. |
| • | Use the search filters available under the Encounter Details panel to filter out specific encounters from the full list of encounters. The name of the filters are Type, Provider, and Case# (if configured). |
| • | To change the patient without leaving the Facesheet screen, click the icon  and select Change Patient option. and select Change Patient option. |
Click the icon  to see the detailed view for that charting or treatment plan element.

![]() to see the detailed view for that charting or treatment plan element.
to see the detailed view for that charting or treatment plan element.
